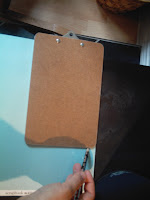

Here's how I did my clipboards-
What I used -
~clipboard
~old wrapping paper,wallpaper or scrapbook paper
~coordinating acrylic paint
~Matte mod podge
~cutter
~old christmas cards
~printed numbers, stickers or rub-ons
~washers
~glue
~sticky back magnets
~exacto knife and cutting board
~double sided tape
~container for numbers
~chipboard or wooden tags
~Coordinating fibers and/or ribbon


The first thing I did was paint the top of my clipboard with a coordinating color. This saves me from having to cut my paper all around the clip.
Then I clipped my background paper in the clipboard to hold it in place while I traced it on my clipboard. This makes cutting easier which is what I did next. I used my cutter, but you could easily use scissors.
Then I clipped my background paper in the clipboard to hold it in place while I traced it on my clipboard. This makes cutting easier which is what I did next. I used my cutter, but you could easily use scissors.
Next I cut a background for my numbers to go on and I Mod Podged it to the clipboard. After that was semi-dry, I glued the washers to it with Tacky glue. Then I cut this snowman off an old Christmas card and podged him on to this clipboard. For the snowflake, I had been given some free cardstock die cuts from our local scrapbook store, so I podged that half on the board and cut off the bit hanging off the edge.


I had a sheet of 'Scenic Route' numbers,(that's just the brand name), so I podged them to some leftover pastebord (from some packaging for something, sometimes it helps to be a packrat) and cut them out, using scissors and an exacto knife. Then I cut and stuck my magnets to the back of the numbers. For the snowflake board I used wooden tags from the Dollar store and stuck some number cut-outs tags to them.
Then I took a rubber band and tied a whole bunch of fibers to it. This made it easy to wrap it around the clip.
Next I printed my sayings on the computer and mounted them on the board. For the snowman board I took my brown ink pad and sponge and just inked the edges of the sayings to 'dirty' them up a bit and make them look more rustic.
Next I printed my sayings on the computer and mounted them on the board. For the snowman board I took my brown ink pad and sponge and just inked the edges of the sayings to 'dirty' them up a bit and make them look more rustic.

 I found an empty plastic battery container and a tin peppermint container to use to hold the numbers. they weren't very pretty so I stuck some coordinating paper on the tin to use for the snowflake numbers and I printed a reindeer on sticker paper for the battery container. I inked this to go with the rustic look of the snowman board.


3 comments:
Thank you so much for sharing! These are too cute! Great instructions!
I like the little boxes for the numbers. I want to go and see if I have some of those around the house...
I just have mine in a white envelope. I guess I could decorate the envelopes up really pretty.
Ah, washers and magnets. I wondered how it would work without hooks.
Great job. The "dirtied" effect and design you made worked so well together.
Post a Comment